How to Make Your Art Into Stickers | GIMP & Silhouette
Two posts this week?!
Amy shared how she creates her character designs and her steps to digitize them. You can turn your digitized art into various projects, and I'm going to tell you how to turn them into stickers! If you have any tips for this process, please share with everyone below! My project will be stickers ideal for Bullet Journals, Planners, Traveler's Notebooks and so much more.The images will have watermarks on them for copyright purposes. We plan on releasing this character in our Etsy Sticker Shop in the future!
Hint: this is not the final product for the shop.
Step One: Open It
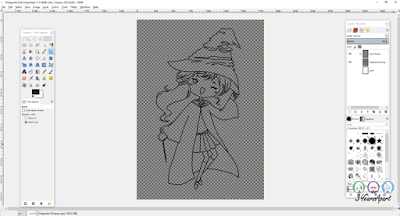 Starting with your digital outline of the sketch, open it in your choice of graphics editor software. I will be using GIMP, feel free to use InDesign, Photoshop, Paint, whatever you got.
I will always use the bucket tool too fill in the lines and make sure they are all crisp and clean. If you start to color in the image without filling the pixels, you will end up with gaps surrounding the lines.
 |
| The hair on the Left is filled, the eye on the right is not. |
 |
| The hair on the Left is filled, the eye on the right is not. |
Step Two: Have Fun!
Now is the where you get to relax and color in your art! Play around with different combinations and find what you like best so far! Remember to save your combos for references. |
| Copyrighted to 3 Years Apart. |
Keep in mind:
- While you or your artist is drawing the character, it's good to check in with each other so you both can see the final design throughout the process.
- Look up references to the initial inspiration for even further inspiration!
- Design while inspired but always refer back to your key points for the final product. It will save you tons and tons of time later on when you catch the little details to change.
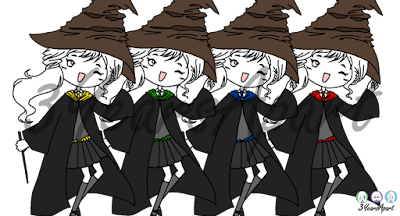 After deciding on your favorite combo, make all the different colors you need for your project. Since ours is Hogwarts themed, of course, we had to include all of the house colors! 3 Years Apart Etsy Shop has options for the customer to choose their hair, skin, and eye color. Therefore, for the beginning stages of production, we left those characteristics white against the transparent background.
Don't Forget!
Look at the detailed areas of the art and clean up any miscolored pixels. You never know when that random color will decide to show up on your final project. I speak from experience.
 |
| You see them right?! I'm not crazy either Amy. |
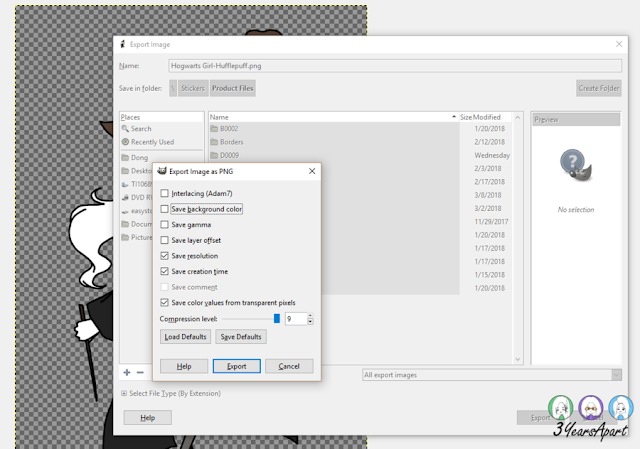
ALWAYS, ALWAYS, ALWAYS save your PNG with NO Background Color. I'm telling you, the sticker making process will be so much easier!
And here's an example of a fully colored character design!
Step Three: Sticker Making Time!
If you have a cutting machine other than the Silhouette, I'm sorry I am unfamiliar with it.
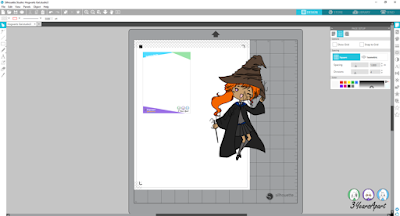 So my fellow Silhouette owners, open up your art now in a PNG or JPEG file in the Silhouette Studio Software. We already have a sticker sheet size for our shop which will act as guidelines for the printing area. If you don't plan on cutting the sticker paper down, then align with the registration marks.
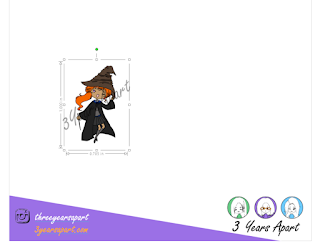 Resize your image to how big you want your sticker to be. Our ideal size will have approx. 1-inch height. This is a good size for bullet journals, traveler's notebooks, stationery, and planners.
- Use the Trace Tool to Select the Trace Area and mark it to trace the outline of the design. This is why saving with a transparent background will save you.
- After tracing and creating the cutlines (usually in red), right-click the red cutline and click on Offset. I am offsetting it by 0.035 inches. Offsetting will follow the cutline and thicken the margin from the design itself. It will also prevent miscuts, where the cuts are into the design itself.
- Now you should have double red cutlines around the design. Delete the first cutline, usually the one closer to the design.
1 |
| Select Trace Area > Solid Fill > Trace Outer Edge |
2
 |
| Cutline Created! Now Right-Click > Offset > Apply Distance |
3
 |
| Two Cutlines Created! Now delete the first/smaller cutline |
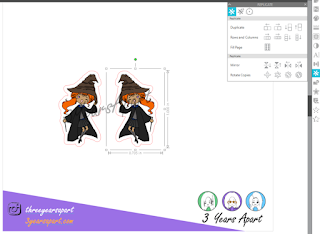
You can add even more variety to your stickers by Mirroring the design.
I found that the face of the Sorting Hat looked kinda funky flipped, so I kept the original orientation.
Fill the area you want to print your stickers. Use the Replicate and Transform Menus to ensure everything is evenly spaced and symmetrical.
 |
| Replicate Menu |
 |
| Transform Menu to align and space out the designs. |
Open the SEND Tab at the top right corner of the software window. Here you see what the software is reading cutlines are on the page. Make sure the things you want to be cut are highlighted. Anything else that is highlighted and you don't want to be cut out, like say text or other shapes, select them and then click on "No Cut" on the menu.
This is the most important part! It will make or break this project.
Check your cutter settings and adjust according to the sticker paper you have! Glossy Sticker Paper settings are not the same as Matte Sticker Paper settings. You can refer to the brand of your sticker paper to see if they have a guide to cutter machine settings. Online Labels has an informative guide to help you get started.
 |
| Everything highlighted in Red will be cut. |
Step Four: Print & Cut
BOOM! YA GOT STICKERS OF YA ART! If you don't feel super proud of yourself right now, then look at the stickers again. Even if there are miscuts, you still did everything else spectacularly! Everybody knows Silhouette machines are temperamental.
But wait... there's a Step Five: Review & Learn
If you think your stickers came out perfect, great! Still, review your process and see what you can do faster, and remember what you learned throughout the process.
These stickers are the first test run of this design before we put it up on the shop. I've taken some notes to make these stickers even more awesome for you all:
- Printed design is too small to see the house colors on the clothing. Recolor the design on bigger areas of the uniform.
- Test print other colors of different areas of the character are not the same. Ex. Brown on the hat is NOT the same shade as the Brunette hair.
- Ask for constructive criticism from Kim and Amy.
- Consider bigger sticker sizes.
That's all I got for now, I'm sure I will have other notes as I continue refining the design.
Good Luck to you all on creating your very own art into stickers!
Do you want more?


Comments
Post a Comment