
How I Start Drawing a Character Design
HELLO~! This is Amy back with another post and (SURPRISE!) it's not a JapanCrate or DokiDoki Crate! xD
 Since the start of 3 Years Apart, the majority of the character designs have been drawn by me. 😯 This post is just a peek into how the character designs come to life.
I love the feel of a sketchbook: the first page flip, the crispy new blank page, and the first time your pencil makes a stroke. That's why I always start all the basic designs in my sketchbook instead of on a tablet or on the computer even though it's an extra step.
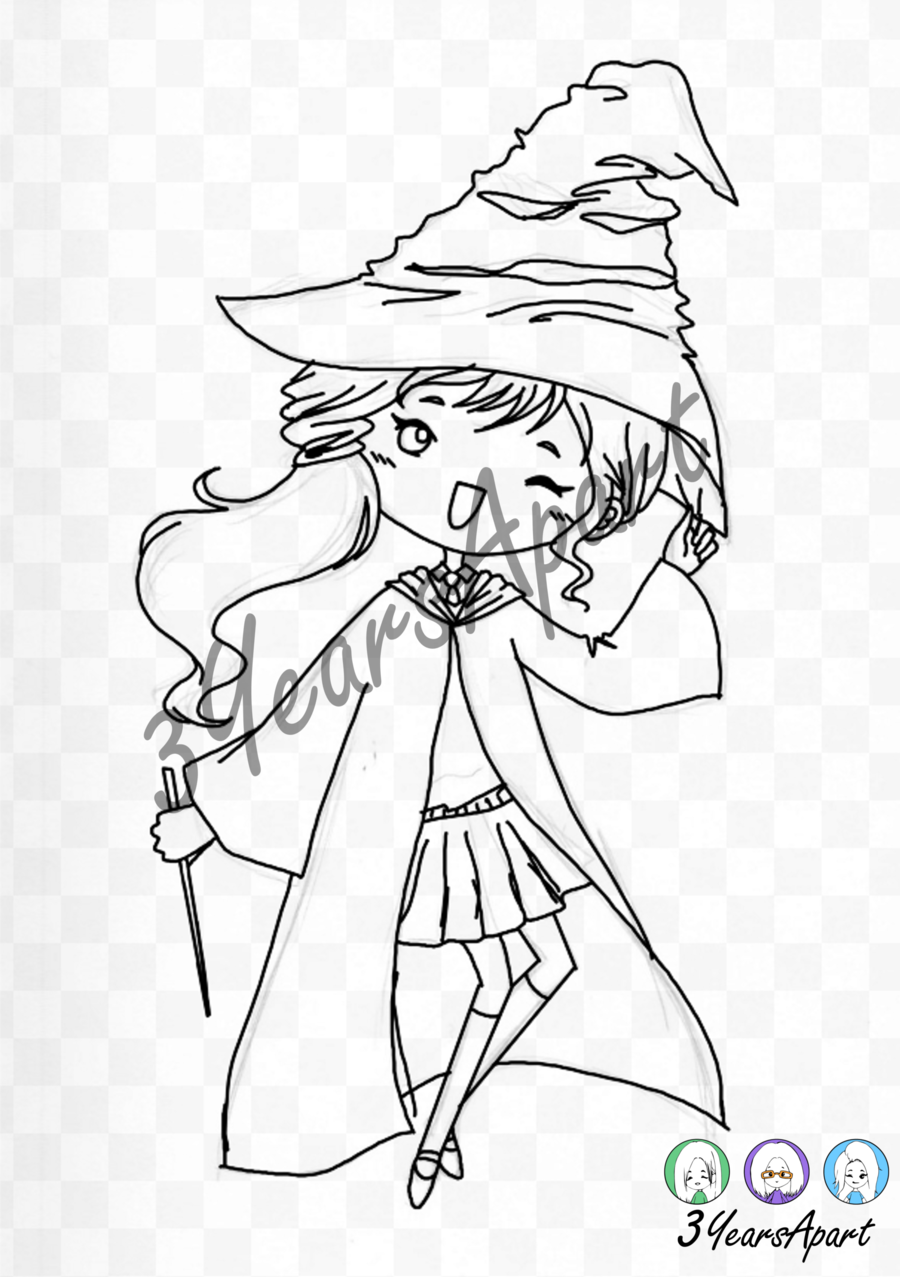
The inspiration for this sketch was from Hogwarts House Pride Week (Harry Potter! Yay~!) that's occurring next week March 20th to March 23rd.
Most of the character stickers so far were suggestions from others and some just started out as just-for-fun sketches.
For the more functional characters such as Fitness Girl, I brainstorm what kind of poses are more useful or most common. A lot of my personal thoughts and feelings towards that specific theme is also put into each character design. Asking my sisters about what they want also helps form some ideas.
One of my main difficulties is pulling the image in my head and putting that image down on paper. I tend to spend a long time "perfecting" each individual character. And again more time when the drawings are scanned to the computer for digitizing.
The program I use for digitizing is Krita. Honestly, I'm still learning how to use this program as I've always just doodled in sketchbooks, rarely on a tablet and computer. The tablet I use is the Huion H610PRO, also a toy I'm still playing around with in order to get more comfortable digitizing my drawings.
One of my most absolute favorite things about digitizing the drawings on Krita is the Layers option. Ever since learning about such a thing as Layers in digital media class in school, I've been obsessed with layers. I tend to have a lot of them. 😁
Step 1: After scanning the drawing into the computer, I open up Krita to start "inking". I create however many layers I think I need such as Hair, Face, Top, etc. And then more layers. And then even more. I'm just kidding! Not really...
Step 2: Trace or "ink" all the main lines I want to keep the original picture. When drawing, I end up having about 5 strokes for one line. It was necessary at the time, I promise.
Step 3: Go back to each individual layer and clean up any stray lines, fix a shaky or unconnected line, or add something that I hadn't previously thought of until just then. This is usually the part that takes the longest for me as I am quite picky about what should be the final image. Also, the part where I make frustrated noises that causes Helen 💡 to glance over while questioning my sanity (heeeeeeeeeeey Helen looooove you I'm not crazy).
Final Step: Bother Helen about the final piece, fix something only I saw was wrong (apparently), and bother Helen again. This part also takes a while because I end up just sitting there SEARCHING for flaws or making something INTO a flaw (that's a no-no...I know, I know! 😓). I need to stop that. I'm working on it...
When I'm finally satisfied with the final draft, it is saved for Helen to edit and color for sticker form.
It's a long process with a few extra steps that could be cut out but I'm still learning and slowly tiptoeing out of my comfort zone. Thanks for sticking with this until the end~! If there are any tips I should know about please let me know!
Thank you~
Do you want more?


I love the feel of a sketchbook: the first page flip, the crispy new blank page, and the first time your pencil makes a stroke. That's why I always start all the basic designs in my sketchbook instead of on a tablet or on the computer even though it's an extra step.
The inspiration for this sketch was from Hogwarts House Pride Week (Harry Potter! Yay~!) that's occurring next week March 20th to March 23rd.

Most of the character stickers so far were suggestions from others and some just started out as just-for-fun sketches.
For the more functional characters such as Fitness Girl, I brainstorm what kind of poses are more useful or most common. A lot of my personal thoughts and feelings towards that specific theme is also put into each character design. Asking my sisters about what they want also helps form some ideas.
One of my main difficulties is pulling the image in my head and putting that image down on paper. I tend to spend a long time "perfecting" each individual character. And again more time when the drawings are scanned to the computer for digitizing.

The program I use for digitizing is Krita. Honestly, I'm still learning how to use this program as I've always just doodled in sketchbooks, rarely on a tablet and computer. The tablet I use is the Huion H610PRO, also a toy I'm still playing around with in order to get more comfortable digitizing my drawings.

One of my most absolute favorite things about digitizing the drawings on Krita is the Layers option. Ever since learning about such a thing as Layers in digital media class in school, I've been obsessed with layers. I tend to have a lot of them. 😁
Step 1: After scanning the drawing into the computer, I open up Krita to start "inking". I create however many layers I think I need such as Hair, Face, Top, etc. And then more layers. And then even more. I'm just kidding! Not really...
Step 2: Trace or "ink" all the main lines I want to keep the original picture. When drawing, I end up having about 5 strokes for one line. It was necessary at the time, I promise.
Step 3: Go back to each individual layer and clean up any stray lines, fix a shaky or unconnected line, or add something that I hadn't previously thought of until just then. This is usually the part that takes the longest for me as I am quite picky about what should be the final image. Also, the part where I make frustrated noises that causes Helen 💡 to glance over while questioning my sanity (heeeeeeeeeeey Helen looooove you I'm not crazy).
Final Step: Bother Helen about the final piece, fix something only I saw was wrong (apparently), and bother Helen again. This part also takes a while because I end up just sitting there SEARCHING for flaws or making something INTO a flaw (that's a no-no...I know, I know! 😓). I need to stop that. I'm working on it...
When I'm finally satisfied with the final draft, it is saved for Helen to edit and color for sticker form.
 |
| Watermarked for Copyright Purposes. |
Thank you~
Do you want more?

Comments
Post a Comment